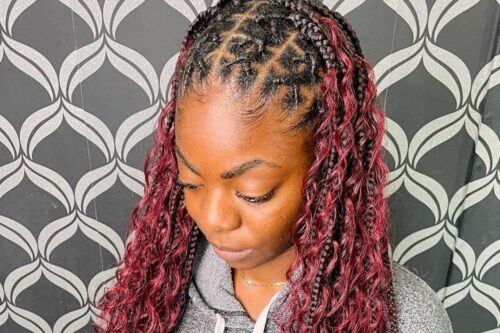
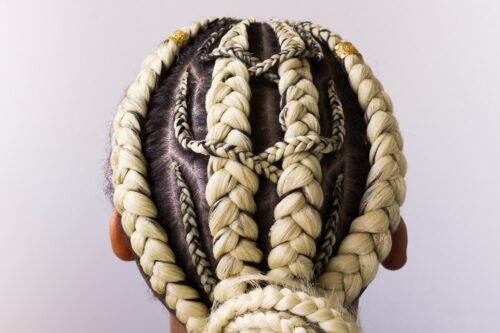
A Butterfly braid, as the name suggests, is elegant and pretty similar to the butterfly. It is also considered one of the protective styling choices that require less amount of time. The style consists of two chunky braids, and the addition of plaiting hair helps maintain your natural hair tucked on plus protected.
The two braid style ends in a thicker and jumbo braid giving a pleasing look for any type of hair. The perfect finishing touch can be obtained by accessorizing your butterfly braids with gold or silver color small strings.
Girls can opt for this style during those days when they want to feel super cool and glam. This versatile hairstyle keeps the hair looking neat and polished even if you are walking down the aisle or running outside the store on a busy day. Once you have figured it how to do butterfly braid, incorporate it into one of your favorite styles. The steps to braid hair in Butterfly Braid hairstyle perfectly is described below:
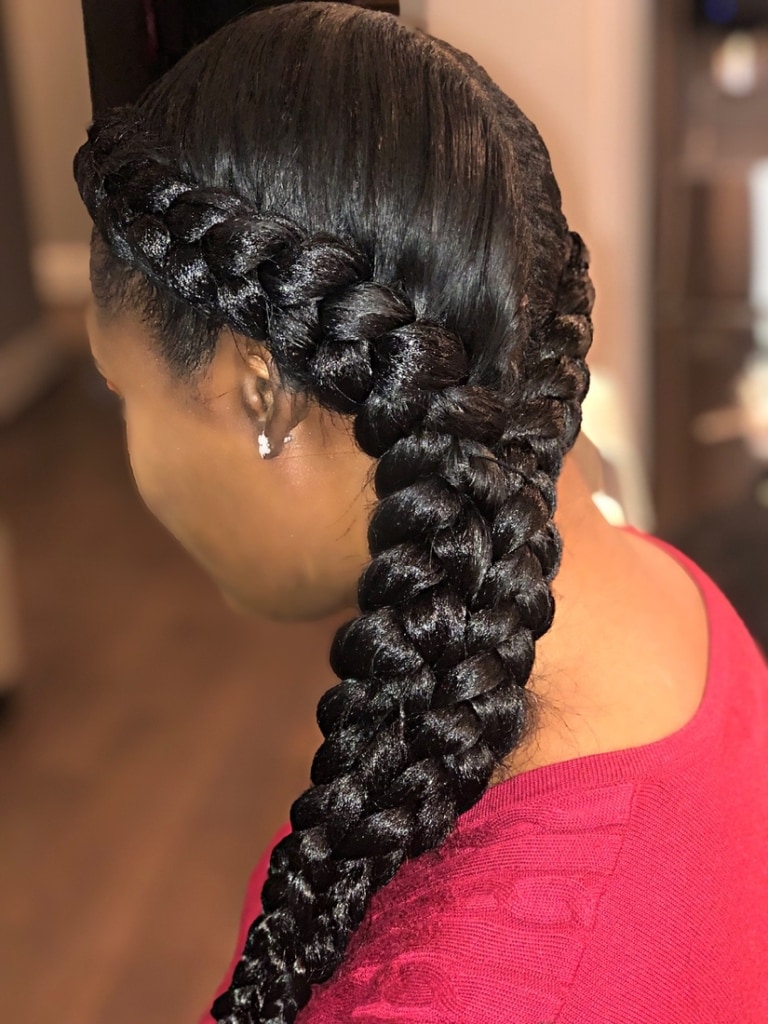
Supply You’ll Need To Make Butterfly Braid
- Comb
- Elastic band
- Hair Clips
Steps To Make Butterfly Braid
1. Triangular Arrangement
- Create a triangular part at your hairline and tighten the section with an elastic band.
- Make a curved part at the left-hand corner of your forehead and set it with any edge control gel.
- Repeat the above steps by assuring the part is in order with the tip of your last year during styling.
2. Stitch Braid
- Stitch braid a section of hair to the left of the portion that you made at the edge of your forehead.
- Pull in more hair as you plait behind to the crown of your scalp by clipping the loose ends down.
- Create a loose cornrow down the center of your head to keep the loose ends out you go.
- Make slightly curved stitch braids using the remaining hair by the cervix of the neck.
3. Curved Cornrow
- Create a cornrow above the very first stitch braid that rises two inches back from your hairline and leaves the edges unbraided.
- Create the other cornrow right above it, starting at the hairline.
- Repeat the same braiding design on the right-hand side of your head, beginning to the right of the triangular part in the middle of your hairline.
4. Butterfly Braid
- Twist the two inches of the hairline, which is left at the front now.
- Start to braid a thicker cornrowed mohawk hairstyle, using all of the free ends.
- Continue the Stitch braids and cornrows that were previously braided, under the center of your head.
- You can coat the head with a mousse and cover it with wrap bands.
- Hit it with heat from a blow dryer and then push the wrap from the hair to set the style.
- Grasp the front part of unbraided hair and design a relaxed feed-in box braid with branches for a more solid finish.
- Connect the box braid to the cornrow braided Mohawk and to achieve the final look tie off and trim the thread.
Butterfly Braid can take up to a maximum of one hour if you are a beginner and can end up at the most half an hour if you are an experienced professionalist by carrying out all the above steps with advanced skills.
It is suitable for any type of hair, and mainly the condition of your hair can give impact obtaining results.
Butterfly Braid does not cause any damage to hair as it does not use any external device like a hair straightener or other tool to worry about this issue.

